

OBS Studio remains the gold standard for live streaming and screen recording in 2026. This free, open-source software powers millions of streams across Twitch, YouTube, and other platforms. While the basics are easy to pick up, there are many lesser-known features that can dramatically improve your stream quality and workflow. Here are 12 essential OBS Studio tips and tricks that every streamer should know, whether you are just starting out or looking to level up your production.
- 1. Switch to GPU Encoding for Better Performance
- 2. Run OBS Studio as Administrator
- 3. Master Hotkeys for a Professional Workflow
- 4. Consolidate Overlays Into a Single Browser Source
- 5. Use the Auto-Configuration Wizard
- 6. Choose the Right Frame Rate and Resolution Balance
- 7. Limit Your Scenes and Sources
- 8. Test Your Stream Before Going Live
- 9. Enhance Your Webcam With OBS Filters
- 10. Unlock Advanced Encoder Settings
- 11. Add Live Captions With Cloud-Based Plugins
- 12. Stay Updated With the OBS Community
- Conclusion
- Related OBS Articles
1. Switch to GPU Encoding for Better Performance
By default, OBS Studio uses your CPU (x264) for video encoding. This puts heavy strain on your processor and often causes frame drops during gaming or heavy multitasking. Switching to hardware encoding via your graphics card fixes this instantly. NVIDIA users should select NVENC H.264 or NVENC HEVC, AMD users can choose AMD HW encoder, and Intel GPU owners can use QuickSync. You will notice a massive difference in both stream smoothness and game performance.
Settings > Output > Encoder (dropdown). Select the hardware encoder that matches your GPU.
2. Run OBS Studio as Administrator
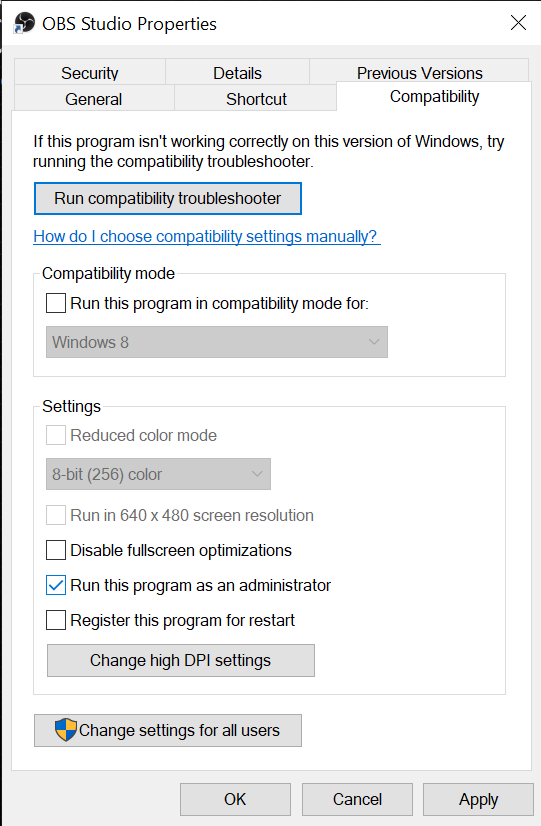
Running OBS as administrator gives the application higher system priority, which is critical for preventing frame drops and stuttering. Windows normally balances resources across all active programs, but when OBS runs in administrator mode, the OS allocates resources to it first. This is especially important if you also experience the OBS window capture black screen issue on certain games or applications, as running as admin often resolves this common problem.
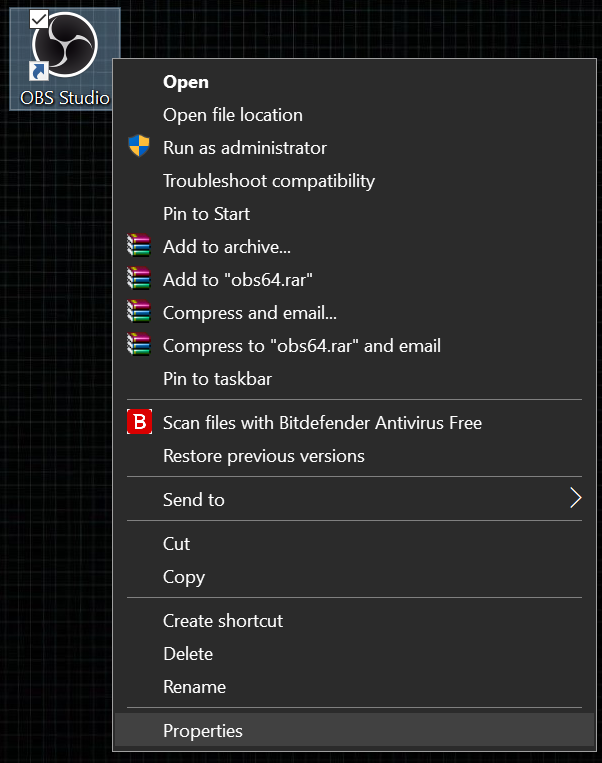
To enable this permanently:
- Right-click the OBS Studio shortcut and select “Properties.”
- Go to the “Compatibility” tab.
- Check “Run this program as an administrator” and click “Apply,” then “OK.”
Now OBS will always launch with elevated privileges, ensuring smooth performance.
3. Master Hotkeys for a Professional Workflow
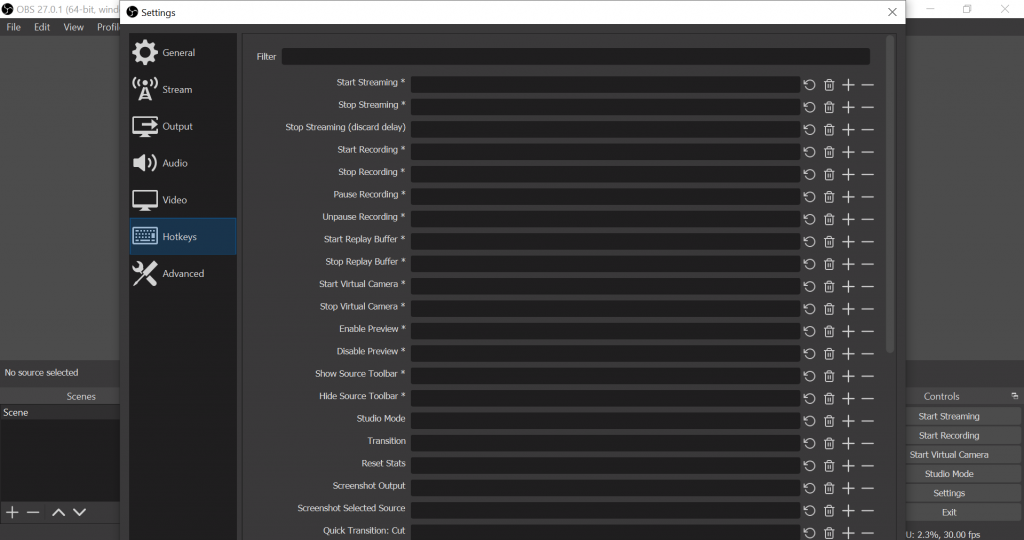
Efficiency during a live stream is everything. The built-in hotkeys system in OBS lets you assign keyboard shortcuts to nearly every action – starting and stopping your stream, switching scenes, toggling sources, muting audio, and more. This eliminates the need to alt-tab out of your game or application mid-stream. Spend 15 minutes setting up hotkeys and your streams will feel significantly more polished and professional.
To create hotkeys, go to Settings > Hotkeys. Every scene, source, and transition can have its own dedicated key combination.
4. Consolidate Overlays Into a Single Browser Source
If your stream setup has multiple overlay elements – alerts, chat boxes, donation trackers – running each as a separate browser source eats up CPU and memory. Tools like StreamElements or Streamlabs let you bundle all overlays into one URL that loads as a single browser source in OBS. This reduces CPU load substantially and keeps your scene collection cleaner and easier to manage. When comparing tools, check out our Streamlabs vs OBS comparison to understand which ecosystem fits your needs.
5. Use the Auto-Configuration Wizard
New to OBS and unsure about bitrate, resolution, and FPS settings? The Auto-Configuration Wizard takes the guesswork out of setup. It asks a few simple questions about your streaming goals, runs a bandwidth test with your chosen platform, and recommends optimal settings based on your hardware and internet connection. Even experienced streamers use it as a baseline when setting up a new PC or switching platforms.
Access it via Tools > Auto-Configuration Wizard in the top menu bar.

6. Choose the Right Frame Rate and Resolution Balance
The choice between 30 FPS and 60 FPS depends on your content and hardware capabilities. For fast-paced gaming, 60 FPS at 720p or 900p often looks better than 30 FPS at 1080p, because viewers notice smooth motion more than resolution differences. For slower content like art streams or talk shows, 30 FPS at 1080p is a great choice. If you are recording your screen with OBS rather than live streaming, you can push both resolution and frame rate higher since you are not constrained by your upload bandwidth.
7. Limit Your Scenes and Sources
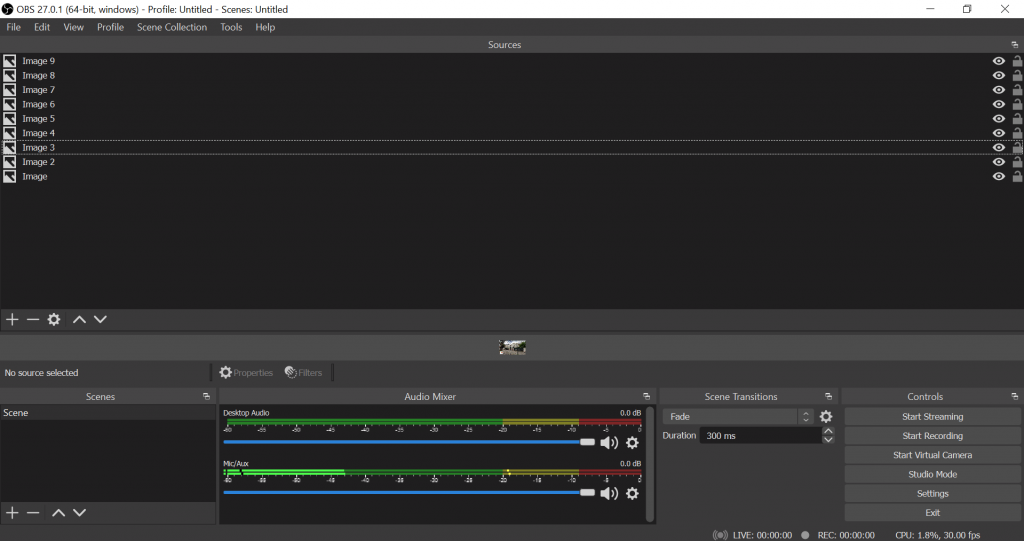
Every scene and source you add increases OBS processing overhead. A bloated scene collection with 50-plus sources can cause lag, even on powerful PCs. Keep your active scene collection lean – aim for 10 to 15 scenes with no more than 25 to 30 total sources. If you stream different types of content, create separate Scene Collections (Scene Collections > New) for each game or format so you only load what you need per session.
8. Test Your Stream Before Going Live
Never go live without a quick test run. Use OBS bandwidth test mode or stream to a secondary test account to verify audio levels, video quality, and scene transitions. Check that all your gear – microphone, webcam, capture card – is connected and recognized. A five-minute pre-stream checklist prevents embarrassing technical issues that could cost you viewers.
9. Enhance Your Webcam With OBS Filters
Your webcam feed is the most personal element of your stream. OBS includes built-in filters that can dramatically improve your camera quality without any third-party software. Right-click your webcam source, select “Filters,” and experiment with Color Correction, LUT (Look-Up Table) files, sharpening, and noise suppression. A well-tuned webcam makes your stream look far more professional, even on budget hardware.
10. Unlock Advanced Encoder Settings
OBS hides its most powerful encoding options behind an “Advanced” toggle. Go to Settings > Output, switch Output Mode to “Advanced,” and you can fine-tune your bitrate, encoder preset, keyframe interval, and profile settings. Setting a rate control like CBR (Constant Bitrate) with an appropriate bitrate cap ensures your stream stays stable even if your internet fluctuates. If you are using the best OBS Studio plugins, the advanced output mode becomes essential for configuring them properly.
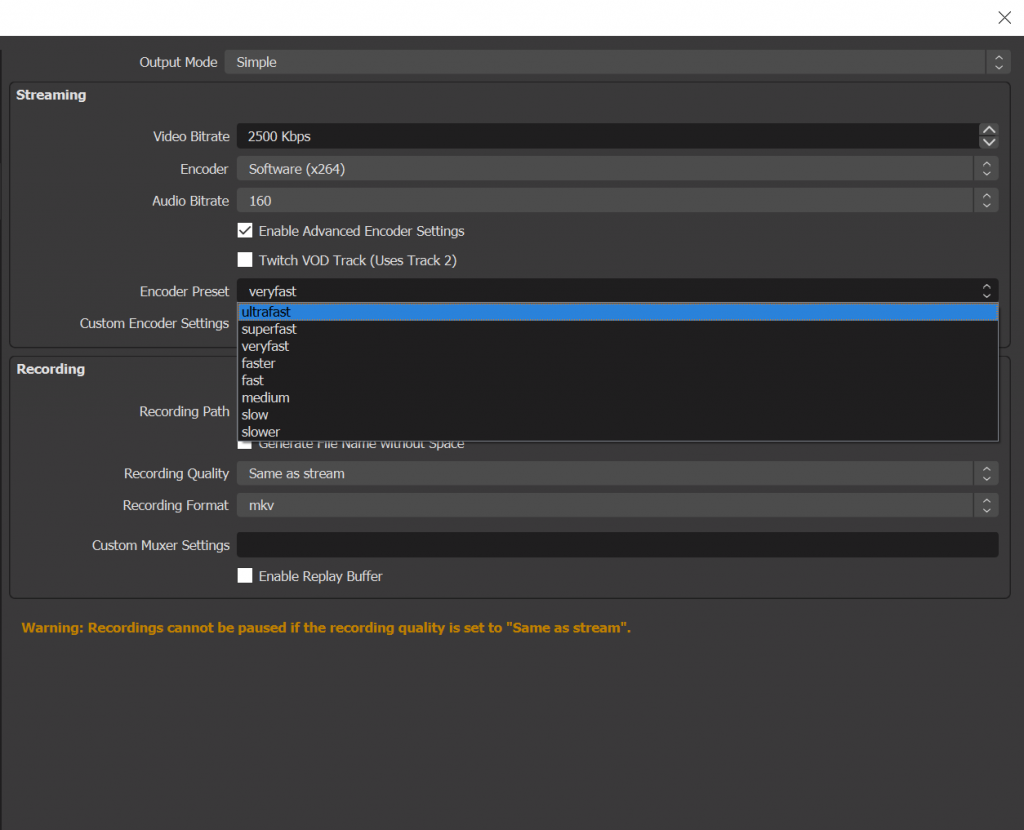
Note: The Encoder Preset options work on a spectrum – slower presets use more CPU for better quality, while faster presets reduce CPU load at the cost of some visual fidelity.
11. Add Live Captions With Cloud-Based Plugins
Accessibility matters. Adding closed captions to your stream helps viewers who are hard of hearing, watching without sound, or non-native English speakers. The OBS Cloud Captions plugin by ratwithacompiler is the gold standard – it uses Google Cloud Speech-to-Text to generate real-time captions from your microphone audio. Configure it to isolate just your voice source so background music does not get transcribed, keeping captions clean and accurate. For Discord-heavy streams, also check out how to mute Discord on OBS to prevent chat notifications from interrupting your broadcast audio.
12. Stay Updated With the OBS Community
OBS Studio is under active development with major updates shipping multiple times per year. The OBS Project team regularly adds features like native YouTube HDR streaming, AV1 encoding support, virtual camera improvements, and integration with new platforms. Following the official OBS blog and community forums keeps you ahead of the curve. Each update often includes performance optimizations and bug fixes that can directly improve your streaming experience.
Conclusion
These 12 OBS Studio tips and tricks cover everything from encoding fundamentals to advanced workflow optimizations. Implementing even a handful of them will noticeably improve your stream quality and reduce technical headaches. Start with GPU encoding and administrator mode for an immediate performance boost, then gradually adopt the others as you grow your channel. OBS is a deep and powerful tool – the more you explore it, the better your content will become.