
Changing from a Windows PC to an Apple Mac can be an energizing time. Particularly in the event that you need it for work purposes and your activity was thoughtful enough to get one. Something less energizing, nonetheless, is learning the unlimited orders and alternate ways that your new Mac has to bring to the table. Regardless of whether you’re figuring out how to exhaust the substance of your refuse or how to take a screenshot, the way toward doing so varies greatly from one to another.
Consequently, we’ve chosen to make this complete guide on the most proficient method to take a screenshot on a Mac. It will disclose how to capture the whole screen, only a bit of the screen, a particular window, and everything in the middle.
Using Key Commands
The simplest method to take a screenshot on your Mac – regardless of whether you’re running Catalina or Mojave–is to use shortcut key commands. They offer amazing adaptability, and when adapted appropriately, can decrease your work time drastically.
Screenshot the entire screen
In macOS Catalina:
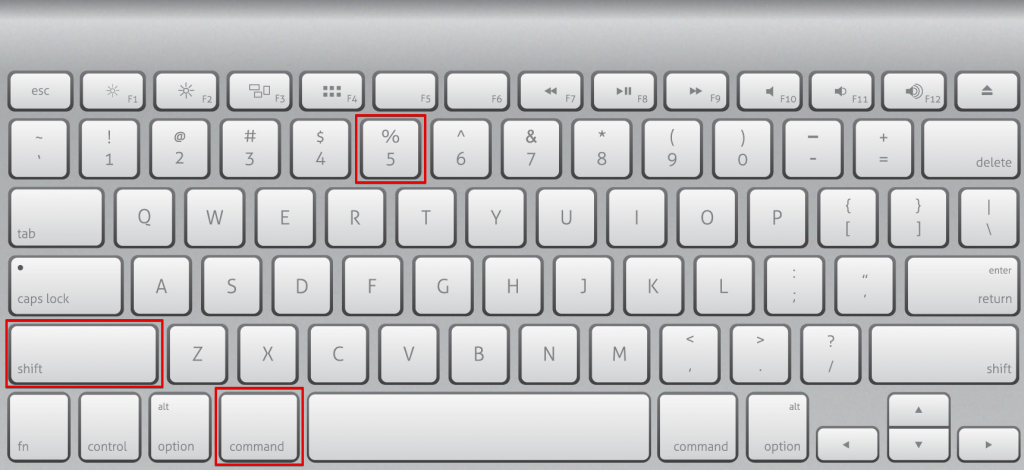
- Start by pressing Command+Shift+5 on your Mac to raise the onscreen capture controls

- On the capture controls, start by choosing the principal alternative macOS Catalina screenshot menu full-screen inline icon which sets the capture mode to the whole screen
 TIP: Hovering over any of the alternatives will raise a tag to tell you what each option does
 - Your pointer will currently change into a little camera macOS Catalina screenshot window inline symbol. You would now be able to tap on any page to take a screenshot of the whole screen
- Confirmation of that screenshot can be found in the lower right-hand corner of your screen. It will show as a thumbnail and will vanish not long after showing up
 TIP: Hovering over any of the alternatives will raise a tag to tell you what each option does
In older macOS versions:
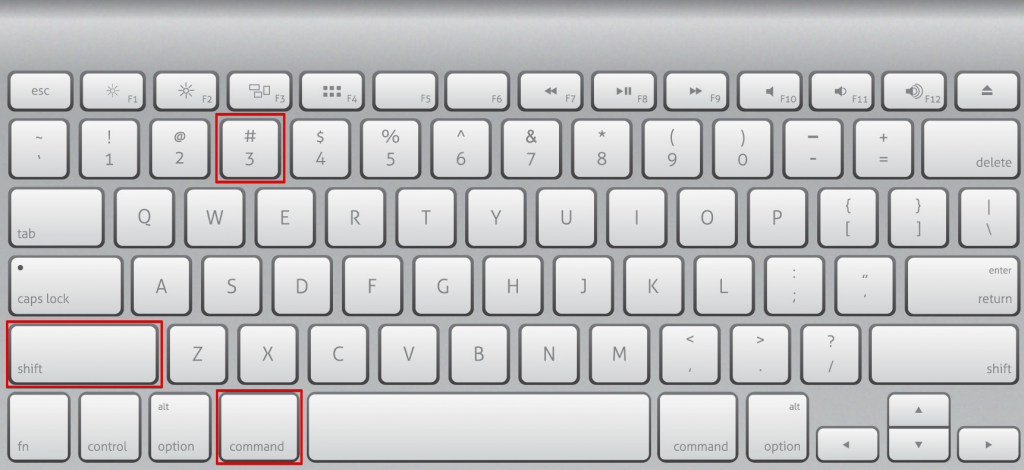
- Basically press Command+Shift+3 to capture the whole screen
Tip: If you discover this strategy simpler, at that point it will work for Catalina also - You will see your screenshot on your desktop. This is set as default by Apple and can be changed in the event that you wish
Screenshot a Window
In macOS Catalina:
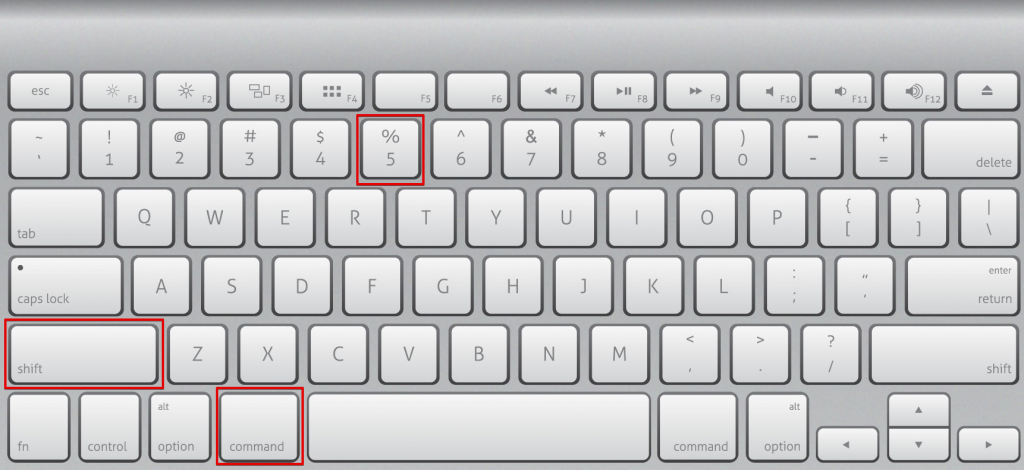
- Start by pressing Command+Shift+5 to open your onscreen capture controls
- Next, select the subsequent choice macOS Catalina screenshot menu window inline icon to set your macintosh to capture the chosen window mode. Your pointer should change to a little camera macOS Catalina screenshot window inline icon to affirm the setup is finished
- You would now be able to tap on any window to screenshot that particular window
- Once more, a little thumbnail will show up in the base right-hand corner of the screen to tell you the screenshot has been taken. At this stage, you can connect with the thumbnail to alter, move, or do different activities
In older macOS versions:
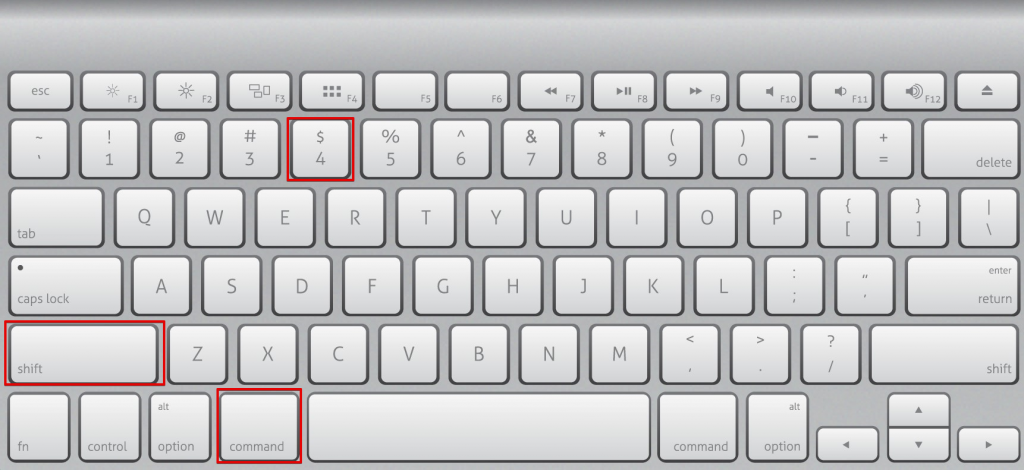
- Just press Command+Shift+4
- The subsequent stage is to press the space bar. Your pointer should now change to a little camera macOS Catalina screenshot window inline icon
- All that is left to do is click on the ideal window you need to screenshot
- Screenshots can be found on your desktop as the default
Screenshot selected portion of the Screen
In macOS Catalina:
- Start by pressing Command+Shift+5 to open your capture control board
- Discover the cropping tool macOS Catalina screenshot menu choice inline icon and select it
- You would now be able to drag a case over the region that you wish to screenshot. On the off chance that you have to move the case, basically get and move it to any place you wish to capture
- To settle the screenshot basically press capture in the onscreen controls
TIP: A thumbnail will show up in the base right-hand corner of the screen to affirm the screenshot has been taken.
In older macOS versions:
- Press Command+Shift+4
- Basically drag the box over where you might want to screenshot
TIP: As soon as you discharge your finger from the trackpad your screenshot will be taken.
Screenshot A Menu
If you’re hoping to take a screenshot of a particular menu, at that point dread not, you can simply follow any of the techniques above to accomplish this objective. On the off chance that you’re using different methods of macOS, at that point essentially follow the means for capturing a chose portion of the screen.
3rd party tool: Monosnap
You can also use 3rd party applications to take a screenshot or capture a particular window on the screen.
We recommend a tool called Monosnap to do the work. Because it’s easy to use and is loaded with a lot of features, like adding a colored box or an arrow mark to show something on a screenshot.
Conclusion
So there you have it, our total guide on the most proficient method to take a screenshot on a Mac. Regarding your Mac’s usefulness, this article is simply starting to expose what is conceivable. Apple items truly are probably the most flexible in the innovations filled universe.
We trust this guide has helped you figure out how to take a screenshot using a mac. If not, don’t hesitate to leave us a message in the comments segment beneath, and we will answer it when we can!
Click here to read similar topics!