

Windows does not automatically shut down after a period of inactivity. It simply goes to sleep or hibernation. While sleep modes help conserve power, keeping your PC running overnight or while you are away can still drain your laptop battery or waste electricity. Scheduling an automatic shutdown solves this problem cleanly.
- Method 1: Shutdown via the Run Dialog
- Method 2: Shutdown via Command Prompt
- Method 3: Shutdown via PowerShell
- Method 4: Shutdown via Task Scheduler
- Method 5: Shutdown via a Batch Script
- Frequently Asked Questions
- Can I schedule a shutdown for a specific time every day?
- Will scheduled shutdowns close my unsaved work?
- How do I cancel a scheduled shutdown?
- Does this work on Windows 11 too?
- Final Thoughts
Whether you want to save power, enforce screen time limits, or ensure your computer powers off after a large download completes, Windows 10 offers several built-in ways to schedule a shutdown. Here are five methods to get it done.
Method 1: Shutdown via the Run Dialog
This is the quickest way to schedule a one-time shutdown.
Step 1: Press Windows + R on your keyboard to open the Run dialog box.
Step 2: Type shutdown -s -t <seconds> and click OK. Replace <seconds> with the number of seconds until shutdown. For a 5-minute delay, use 300.
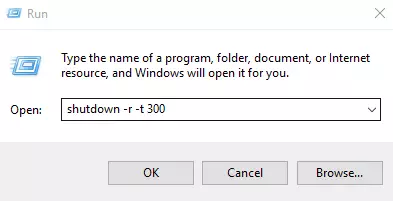
To cancel: Open Run again, type shutdown -a, and press Enter. A notification will confirm the shutdown has been aborted.
Method 2: Shutdown via Command Prompt
If you prefer working in the terminal, Command Prompt gives you the same control with more flexibility.
Step 1: Click the Start menu, type cmd, right-click Command Prompt, and select Run as administrator.
Step 2: Type shutdown -s -t <seconds> and press Enter. For a 10-minute delay, set the value to 600.
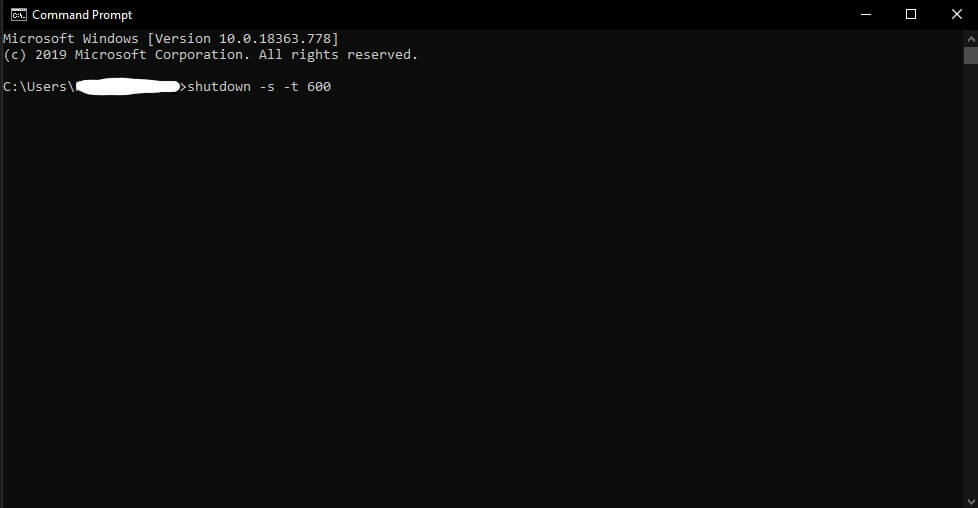
Step 3: Windows will confirm the scheduled shutdown with a notification in the system tray. You can also combine shutdown parameters like -f (force close apps) and -c “message” (add a custom message). For more advanced Windows command-line tricks, check out our guide on activating Windows 10 via Command Prompt.
Method 3: Shutdown via PowerShell
PowerShell works almost identically to Command Prompt for the shutdown command.
Step 1: Open the Start menu, type Powershell, right-click Windows PowerShell, and select Run as administrator.
Step 2: Type shutdown -s -t <seconds> and press Enter. Use the same syntax to set any delay you need.
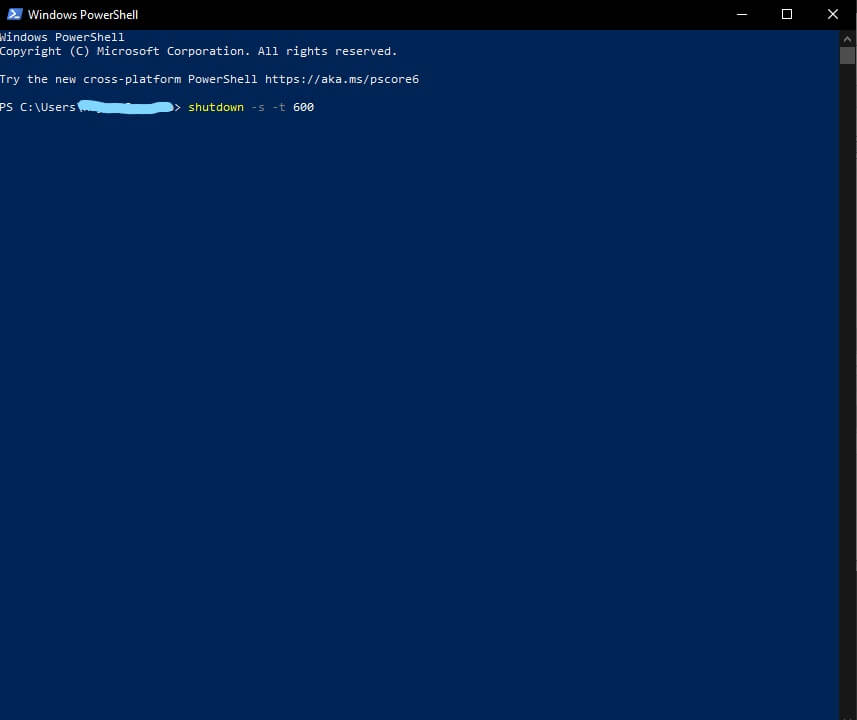
Step 3: A notification will appear confirming the shutdown schedule. PowerShell also supports the shutdown -a command to abort, just like Command Prompt.
Method 4: Shutdown via Task Scheduler
Task Scheduler is the best option for recurring shutdowns. You can set your PC to turn off at the same time every day or week.
Step 1: Open the Start menu, type Task Scheduler, and open it. Click Create Task in the Actions panel on the right.
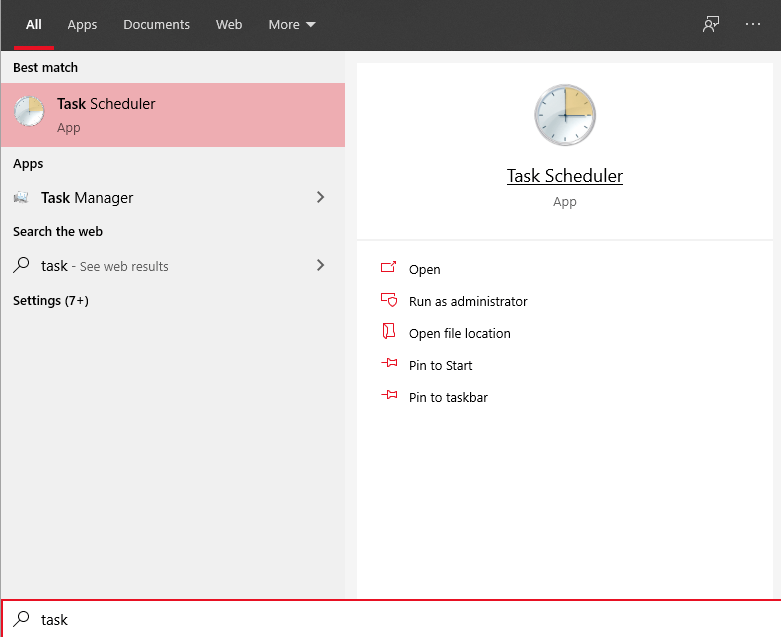
Step 2: Give the task a name like “Auto Shutdown.” Check Run with highest privileges and set Configured for to Windows 10.
Step 3: Open the Triggers tab and click New. Choose On a schedule, select your frequency (daily, weekly, or one time), and set the date and time. Ensure the Enabled box is checked.
Step 4: Open the Actions tab and click New. Set the action to Start a program. Browse to C:\Windows\System32\shutdown.exe. In the Add arguments field, type -s.
Step 5: Click OK to save. Your task will now run automatically at the scheduled time. If Task Scheduler feels overwhelming, the Run dialog method (Method 1) is simpler for one-time use. You can also explore other Windows utility guides like speeding up your internet connection on Windows 10 for more system optimization tips.
Method 5: Shutdown via a Batch Script
A batch script gives you full control with custom timing logic. This is useful if you want the shutdown to trigger at a specific clock time rather than after a countdown.
Step 1: Right-click your desktop and create a new text document.
Step 2: Paste the following code. Replace 22:00 with your desired shutdown time in 24-hour format.
@echo off
:W
timeout /t 30 /nobreak
echo %time% |find "22:00" >nul || goto :W

shutdown.exe /s /f /t 60 /c "Time to shut down!"
Step 3: Press Ctrl + Shift + S, name the file AutoShutdown.bat, change Save as type to All files, and click Save.
Step 4: Double-click the batch file to run it. Keep the command window open in the background. The script checks the system clock every 30 seconds and triggers the shutdown when the target time is reached.
To stop it, simply close the command prompt window.
Frequently Asked Questions
Can I schedule a shutdown for a specific time every day?
Yes. Use Task Scheduler (Method 4) and set the trigger to Daily with your preferred time. The task will repeat every day at that hour. If you prefer a lighter approach, try the batch script method with your target time hardcoded.
Will scheduled shutdowns close my unsaved work?
Yes, if applications have unsaved changes. Add the -f flag (force) to the shutdown command to close all applications forcefully. Always save your work before a scheduled shutdown. For more Windows troubleshooting guides, see our article on fixing CPU fan errors.
How do I cancel a scheduled shutdown?
Open Command Prompt, PowerShell, or the Run dialog and type shutdown -a (abort). Press Enter and a notification will confirm the cancellation. This works for any shutdown you set using methods 1 through 3.
Does this work on Windows 11 too?
Yes. All five methods work identically on Windows 11. The commands and Task Scheduler interface have not changed. If you are upgrading from Windows 10, check out our guide on accessing the WindowsApps folder if you run into permission issues.
Final Thoughts
Scheduling an automatic shutdown in Windows 10 is simple once you know the right commands. The Run dialog works best for quick one-time tasks. Task Scheduler handles recurring schedules reliably. Batch scripts offer the most customization for advanced users.
Try the method that fits your workflow and you will never leave your PC running overnight by accident again. If you found this guide helpful, leave a comment below!