
With the Pandemic that is spread all over the world, the number of users of video calling applications has increased a lot because of the Lock-Down. If you are someone who is chatting with your friends through video calling application then you should definitely know about this cool application- Avatarify.
What is Avatarify?
Want to look like Einstein or Eminem or Donald Trump or Elon Musk, literally whoever you want to look like, you can do it through Avatarify. Or if you are attending a video call with your superiors and you want to present yourself nice and tidy, you can do it with Avatarify.
It is nothing but a cool and interesting application that allows you to change your face into someone else’s face in a video call by just adding it as a plug-in with your video-conferencing application(mostly all of them) and Since, Avatarify and is licensed under Creative Commons Non-Commercial license, which means you are free to use anyone’s face for non-commercial purposes without any legal obligations. Avatarify is based on First Order Motion Model.
This is how Avatarify works!
- Advertisement -
System Requirements
In order to run Avatarify smoothly, you need a CUDA-enabled (NVIDIA) video card. Otherwise, it will fall back to the central processor and run very slowly. These are performance metrics for some hardware:
- GeForce GTX 1080 Ti: 33 fps
- GeForce GTX 1070: 15 fps
Of course, you also need a webcam!
Avatarify requires a CUDA-enabled NVIDIA GPU to perform heavy tasks. Macbooks don’t have such GPUs, and for processing use CPU, which has much less computing power to run Avatarify smoothly, so we haven’t included it in this blog.
Installation Process
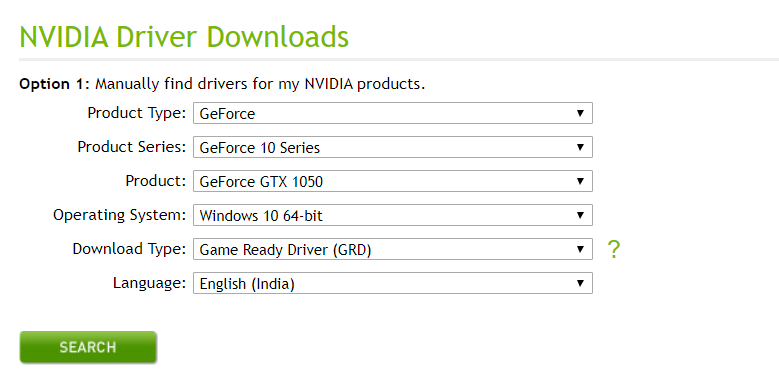
- First, you need to download the latest version of your Nvidia driver. Click here to visit the Nvidia site, select your graphics card model from the list, and press Search.

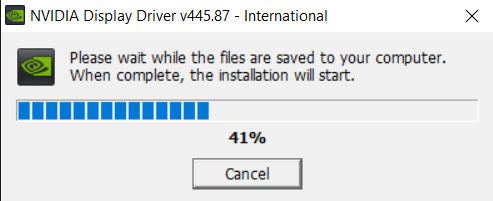
If the latest driver is available, Download and Install it.
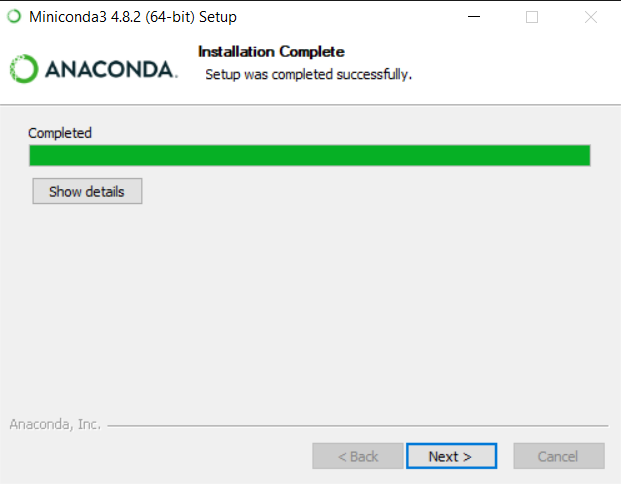
- Next, Install Miniconda Python 3.7. While installing no need to change any options, just press Next.

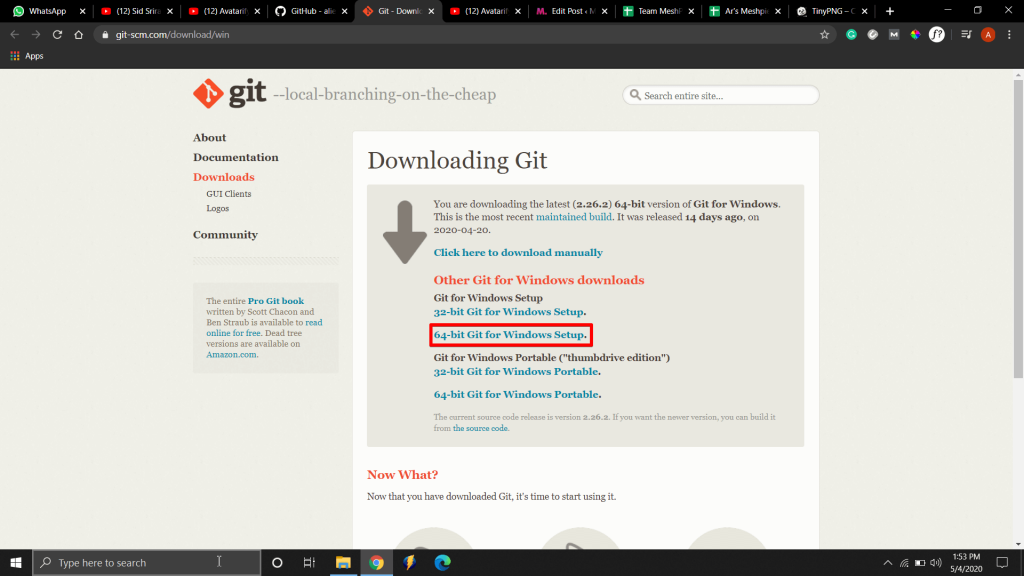
- Download and Install Git(It is used for fetching the source code). While installing no need to change any options, just press Next.

- Press the Windows button and type “miniconda“. Run suggested Anaconda Prompt.

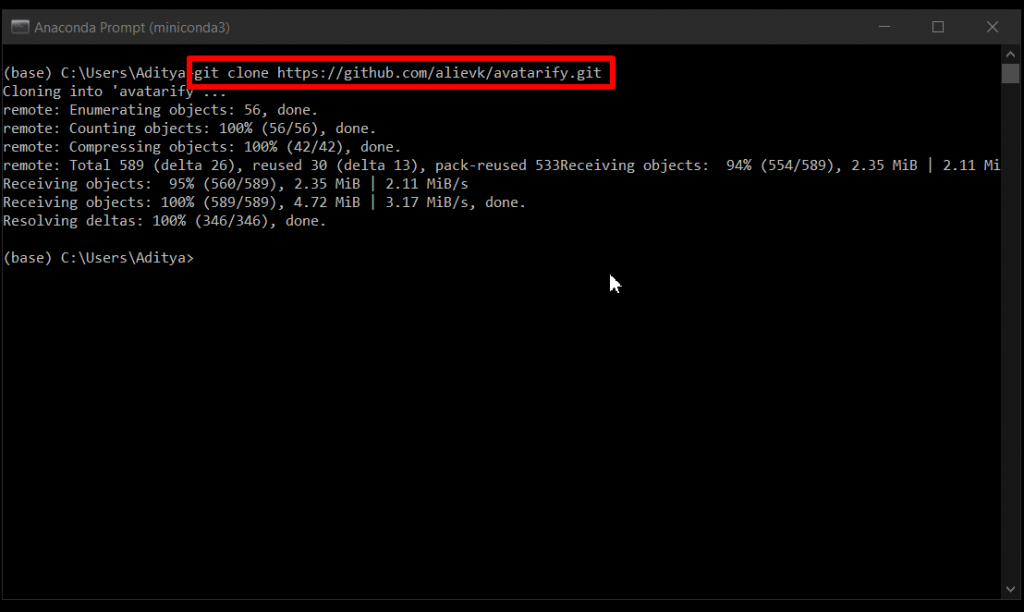
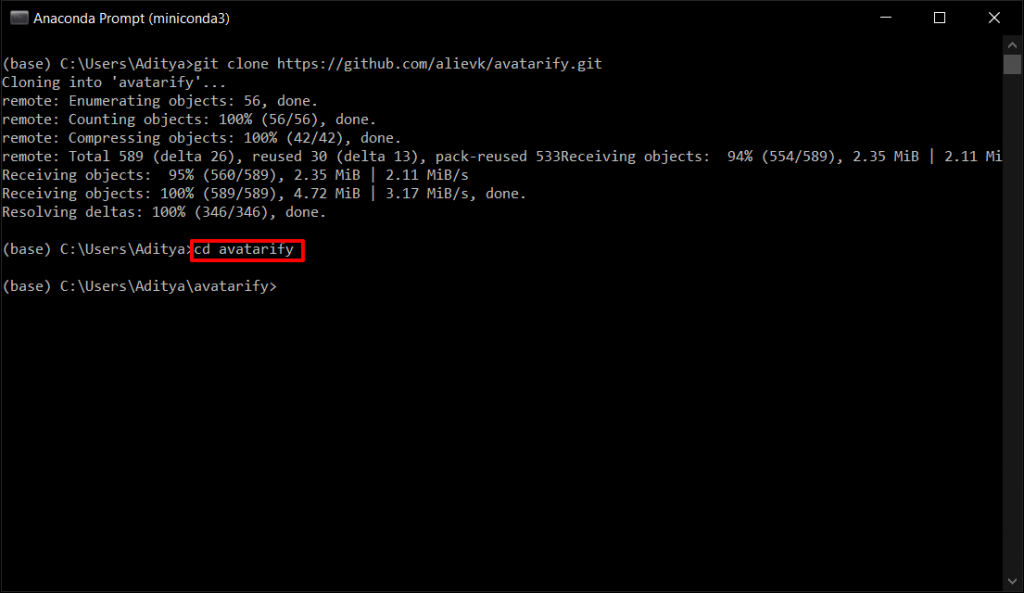
- To install Avatarify, copy-paste these 3 commands and don’t change them. The 3rd command will take some time. Don’t close this window till the end.
git clone https://github.com/alievk/avatarify.git
cd avatarify
scripts\install_windows.bat
- Advertisement -
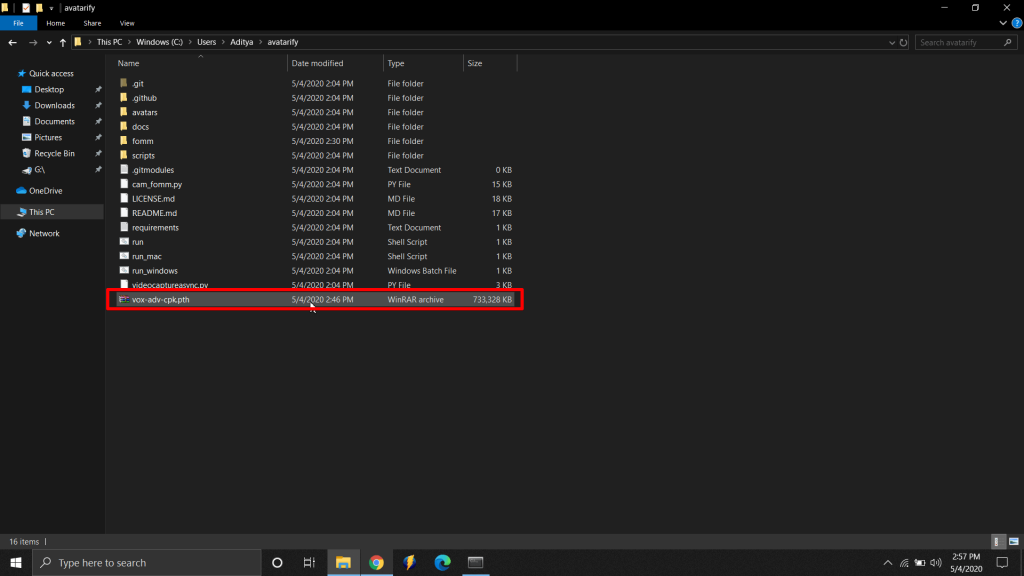
- Download the model’s weights from any of the below-mentioned mediums as per your wish. Dropbox, Mega, Yandex.Disk or Google Drive. The file size is 716 MB.
- Once you have downloaded it, without unzipping the file, place
vox-adv-cpk.pth.tarfile in theavatarifydirectory. This location can be found on the miniconda prompt page you opened previously.
- Once you are at the location, copy and paste the download file(716MB) on the Avatarify folder.
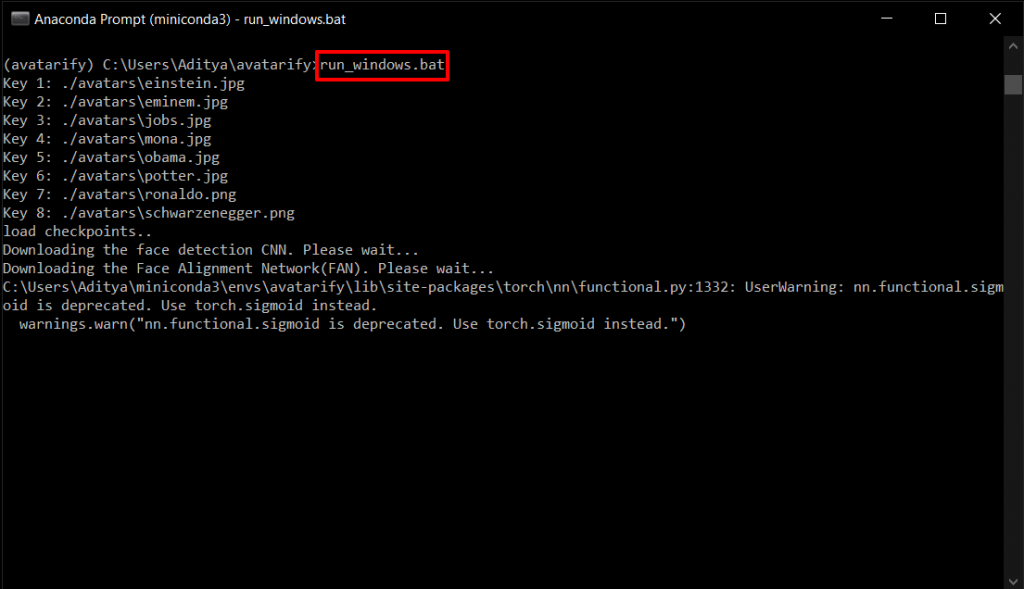
- Run
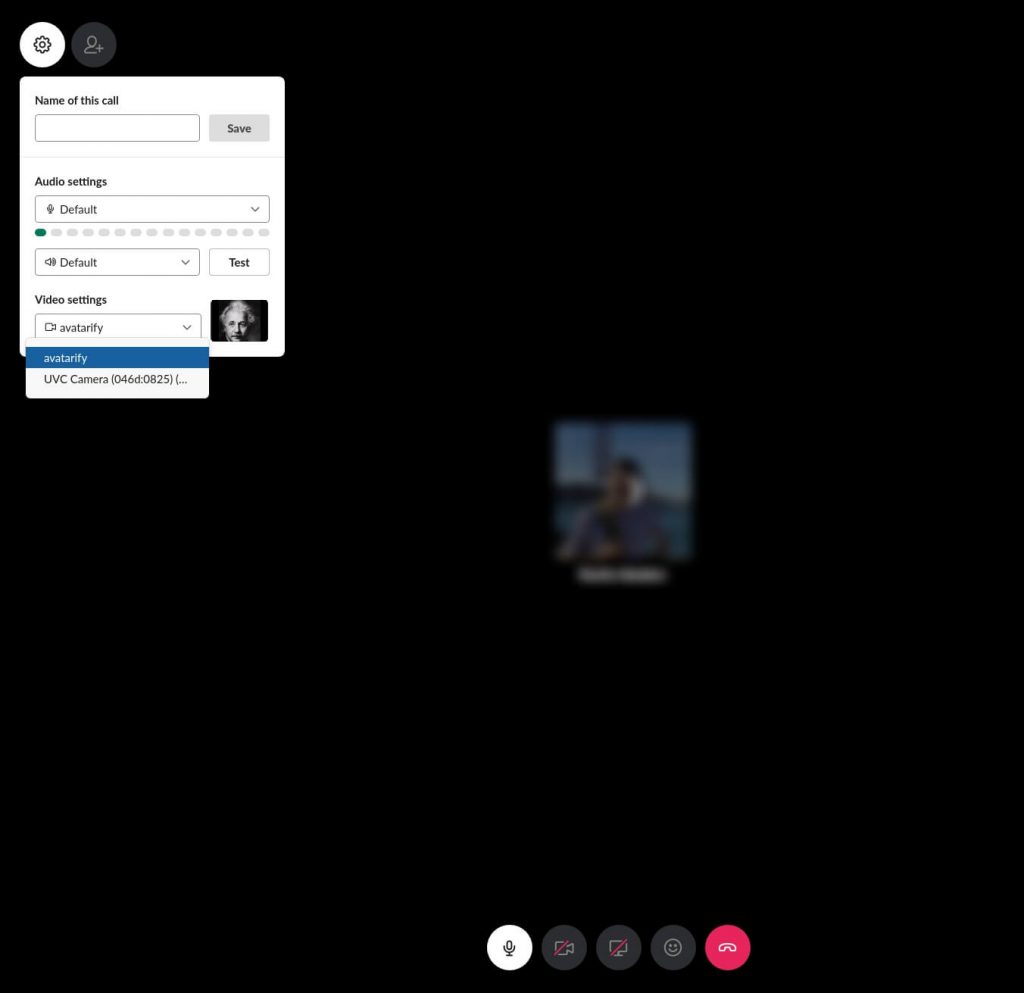
run_windows.bat. If the installation is successful, two windows “cam” and “avatarify” will appear. That is, one is your face and another is Einstein’s face will appear. Leave these windows open, you will need it for the next installation steps. If there are multiple cameras (including virtual ones) in the system, you may need to select which camera you want. Openscripts/settings_windows.batand editCAMIDvariable.CAMIDis an index number of cameras like 0, 1, 2, …
- Next, Download and Install OBS Studio for capturing Avatarify output. This will help to stream the avatarified face to video conferencing applications like Zoom, Google meet, Skype and many others.
- Now, Download and Install VirtualCam plugin. Choose
Install and register only 1 virtual camera. Press the Go to download to install it. Also while installing, select “Install plugin and register only 1 virtual camera option”.
 - Run the OBS Studio application. In the Sources section, press “+” option, select Windows Capture, and press OK. In the window that is appearing next, choose “[python.exe]: avatarify” in Window drop-down menu and then press OK. Now select Edit -> Transform -> Fit to screen.

- In OBS Studio, go to Tools -> VirtualCam. Make sure AutoStart option is checked, set Buffered Frames to 0 and press Start.
- Now
OBS-Camerawill be available on video-conferencing applications.
 Press the Go to download to install it. Also while installing, select “Install plugin and register only 1 virtual camera option”.
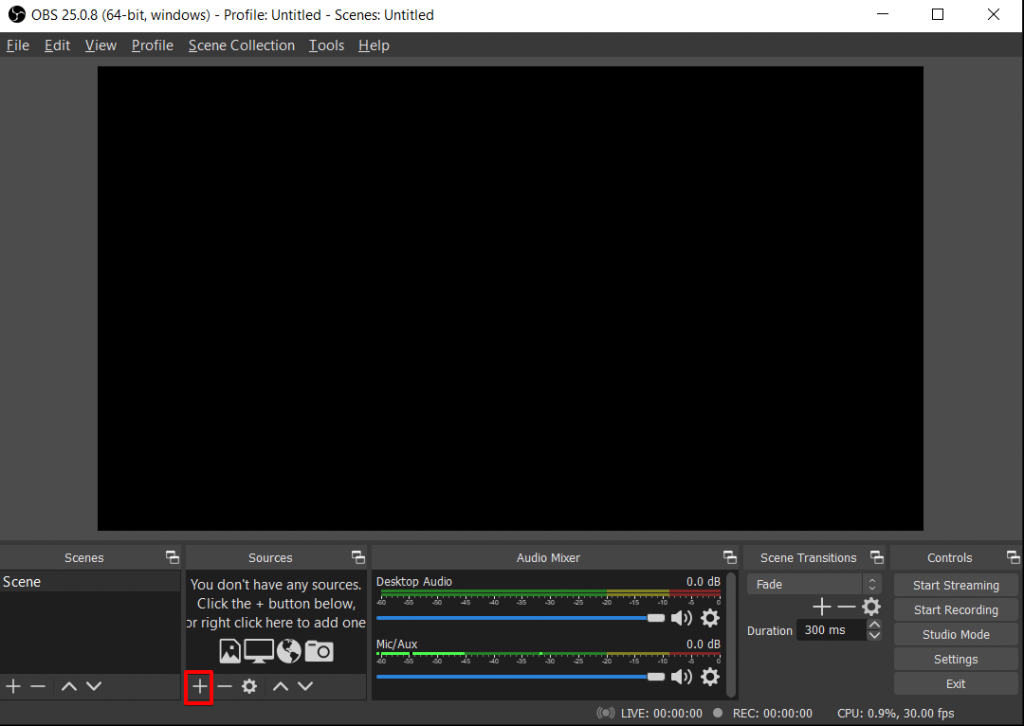
How To Add New Avatars?
This software comes with few avatars as default and if you wish to add new avatars, it is very simple, Go to Avatarify folder, select the Avatars file and paste the .jpg or .png file of the avatar that you wish to look like in your video-conferencing applications.
![]()
- Advertisement -
How To Setup OBS Studio To Various Video-Conferencing Applications
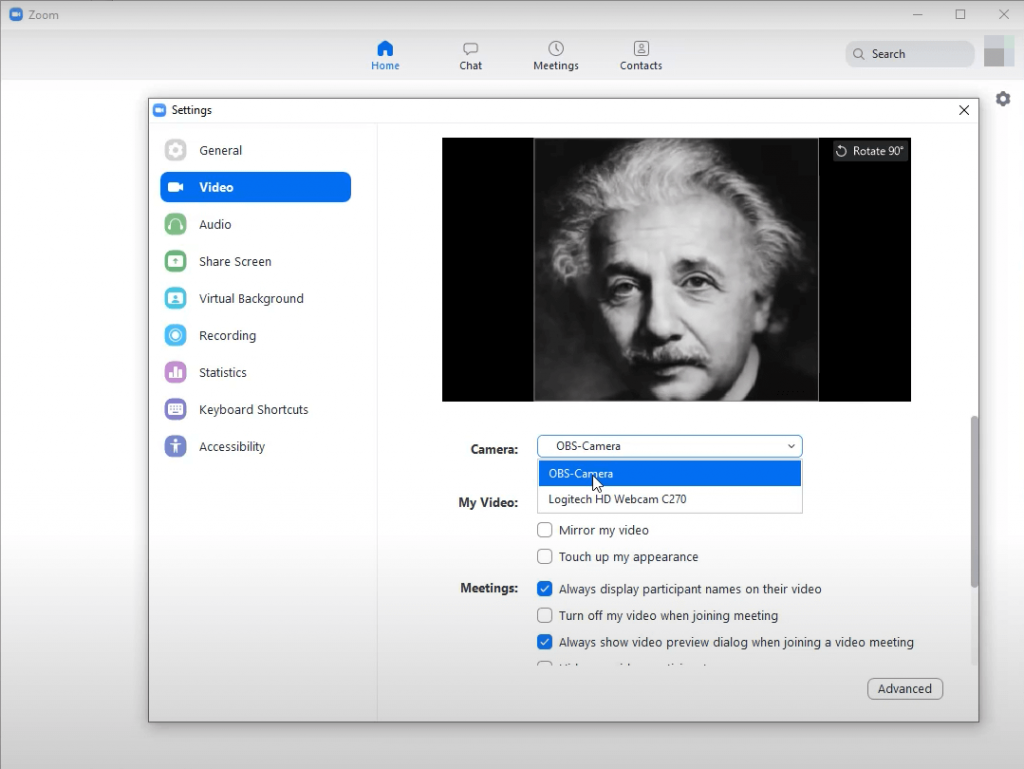
Zoom
Start the Zoom application, go to Settings, select Video and in the camera option select OBS camera.
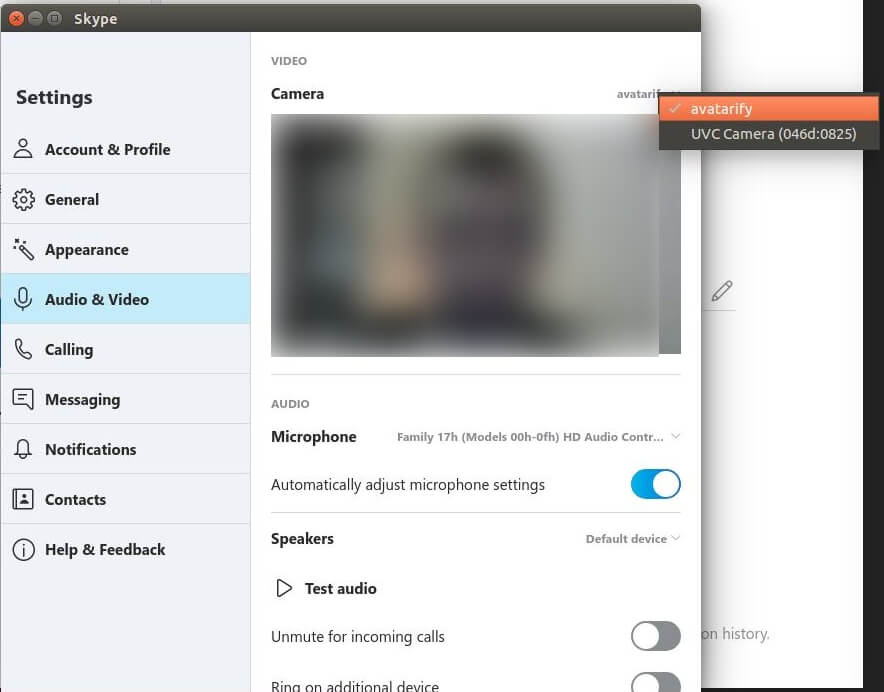
Skype
Go to Settings -> Audio & Video, choose OBS-Camera camera.
Microsoft Teams
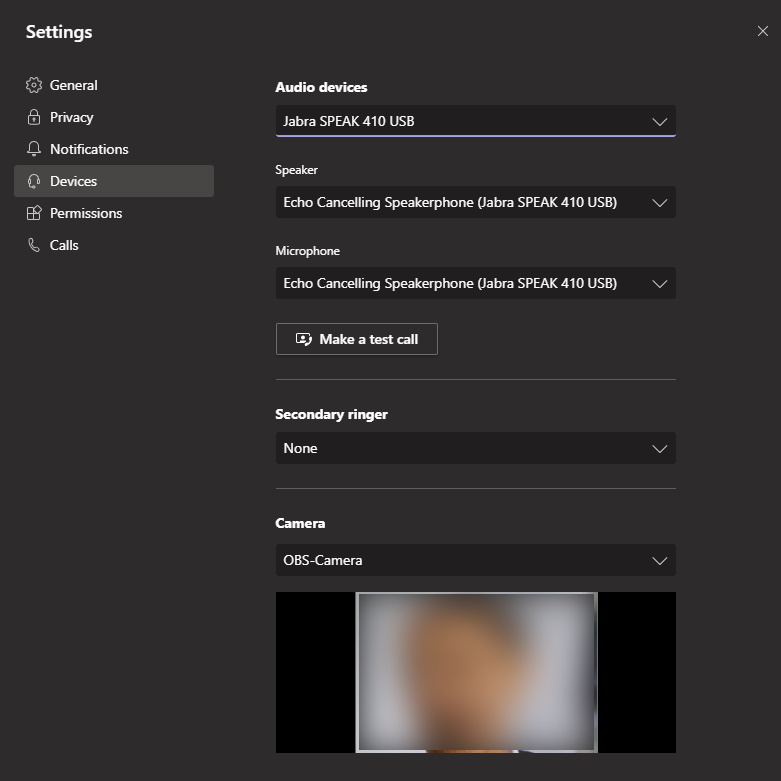
Go to your profile picture -> Settings -> Devices and choose OBS-Camera from Camera drop-down menu.
Slack
Make a call, allow browser using cameras, click on Settings icon, choose OBS-Camera in Video settings drop-down menu.
Basic Controls On Avatarify
| Keys | Controls |
|---|---|
| 1-9 | These will immediately switch between the first 9 avatars. |
| Q | Turns on StyleGAN-generated avatar. Every time you push the button – a new avatar is sampled. |
| 0 | Toggles avatar display on and off. |
| A/D | Previous/next avatar in the folder. |
| W/S | Zoom camera in/out. |
| U/H/J/K | Translate camera. H – left, K – right, U – up, J – Down by 5 pixels. Add Shift to adjust by 1 pixel. |
| Shift-Z | Reset camera zoom and translation |
| Z/C | Adjust avatar target overlay opacity. |
| X | Reset reference frame. |
| F | Toggle reference frame search mode. |
| R | Mirror reference window. |
| T | Mirror output window. |
| I | Show FPS |
| ESC | Quit |
FAQs
Do I need any knowledge of programming to run Avatarify?
Why haven’t you included how to download on Macbook?
I don’t have an NVIDIA GPU, can I run it?
I have an ATI GPU (e.g. Radeon). Why does it work so slow?
My avatar looks distorted.
Can I use Avatarify for commercial purposes?
What video conferencing apps does Avatarify support?